
THE KEY POINT
A skin in your CaseHug inventory and a skin delivered to Steam are different stages. Start with the item’s withdrawal action, then check the trade destination and any availability message.
01
Start with the item in My Account
Open My Account → Inventory and select the intended skin. CaseHug’s help article calls the withdrawal action Claim on Steam; its accompanying screenshot labels the green action Get on Steam. Use that Steam action rather than Sell or Exchange.
Keep the exact item name and displayed condition beside you when checking the incoming offer. A generic weapon thumbnail is not enough to identify the item you intended to receive.
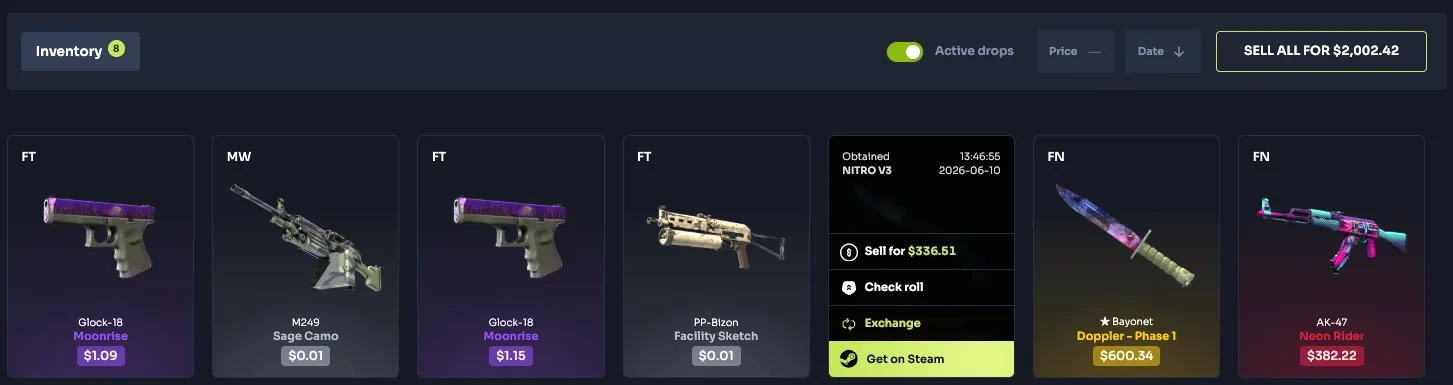
Step 1 — Open the item’s actions in Inventory. The official screenshot shows Get on Steam below Sell, Check roll and Exchange.
Open the full-size image to read small interface details.02
Save your current Steam Trade URL
In CaseHug account settings, paste your current Steam Trade URL and choose Save. On Steam, find it under Inventory → Trade Offers → Who can send me Trade Offers? Regenerating that URL makes the previous link obsolete.
CaseHug requires a public Steam profile and inventory for this flow. Read any restriction shown by Steam itself: a site setting cannot remove a Steam account restriction. If there is already an incoming offer, verify it before accepting.
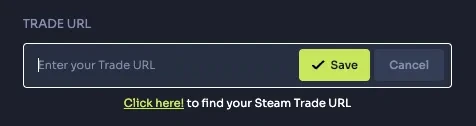
Step 2 — Paste the complete Steam Trade URL into this CaseHug setting and press Save. Keep the personal URL out of public screenshots.
Open the full-size image to read small interface details.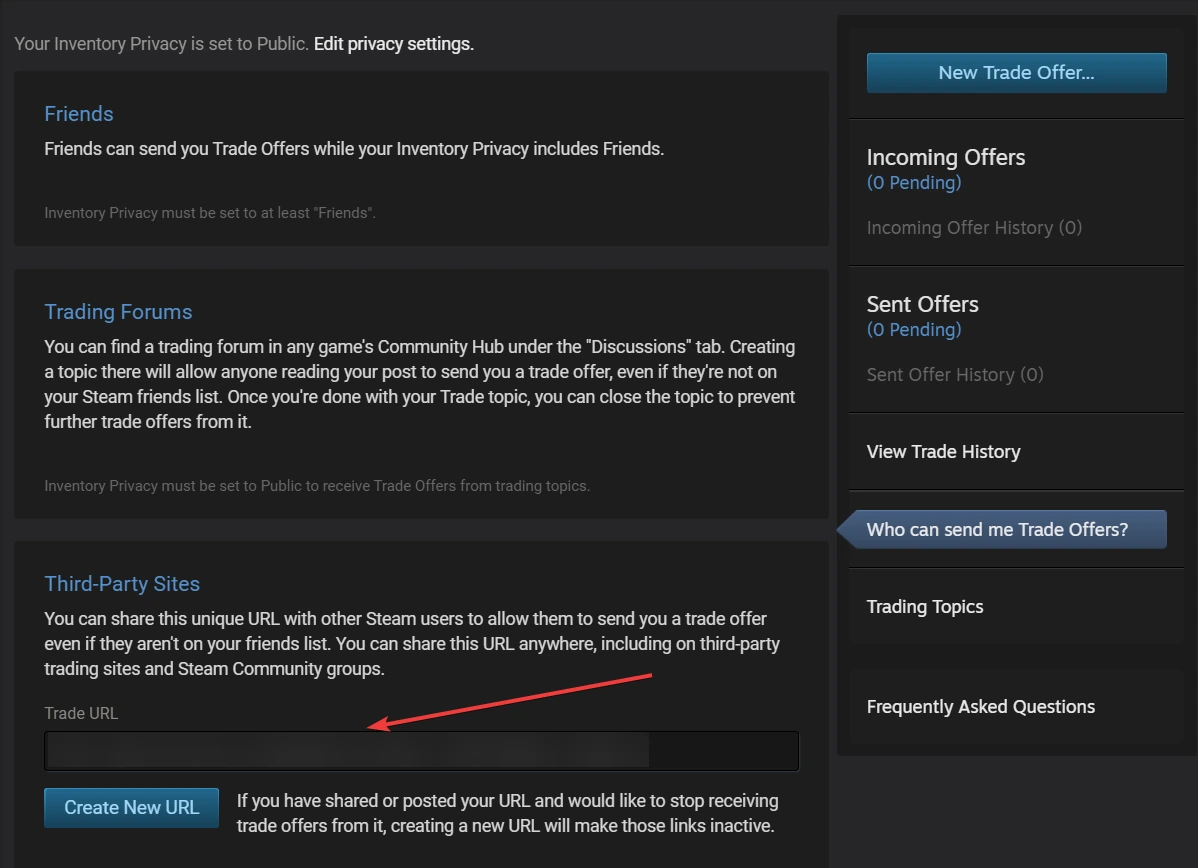
Steam step — Find the complete Trade URL under Third-Party Sites, then use the CaseHug Save control shown above. The screenshot shows Steam, with its private token obscured.
Open the full-size image to read small interface details.03
If the item is unavailable, check stock separately
CaseHug explains an unavailable skin as an item absent from its current withdrawal inventory. Waiting and checking again is one option. SkinChanger is another: it lets you select a different available item instead of waiting for that particular skin.
In SkinChanger, your offered items are on the left and the requested items are on the right. Review both sides before confirming. This changes the item you will receive; it is not a way to make an unavailable item appear. The source screenshot illustrates the layout, not today’s prices or stock.
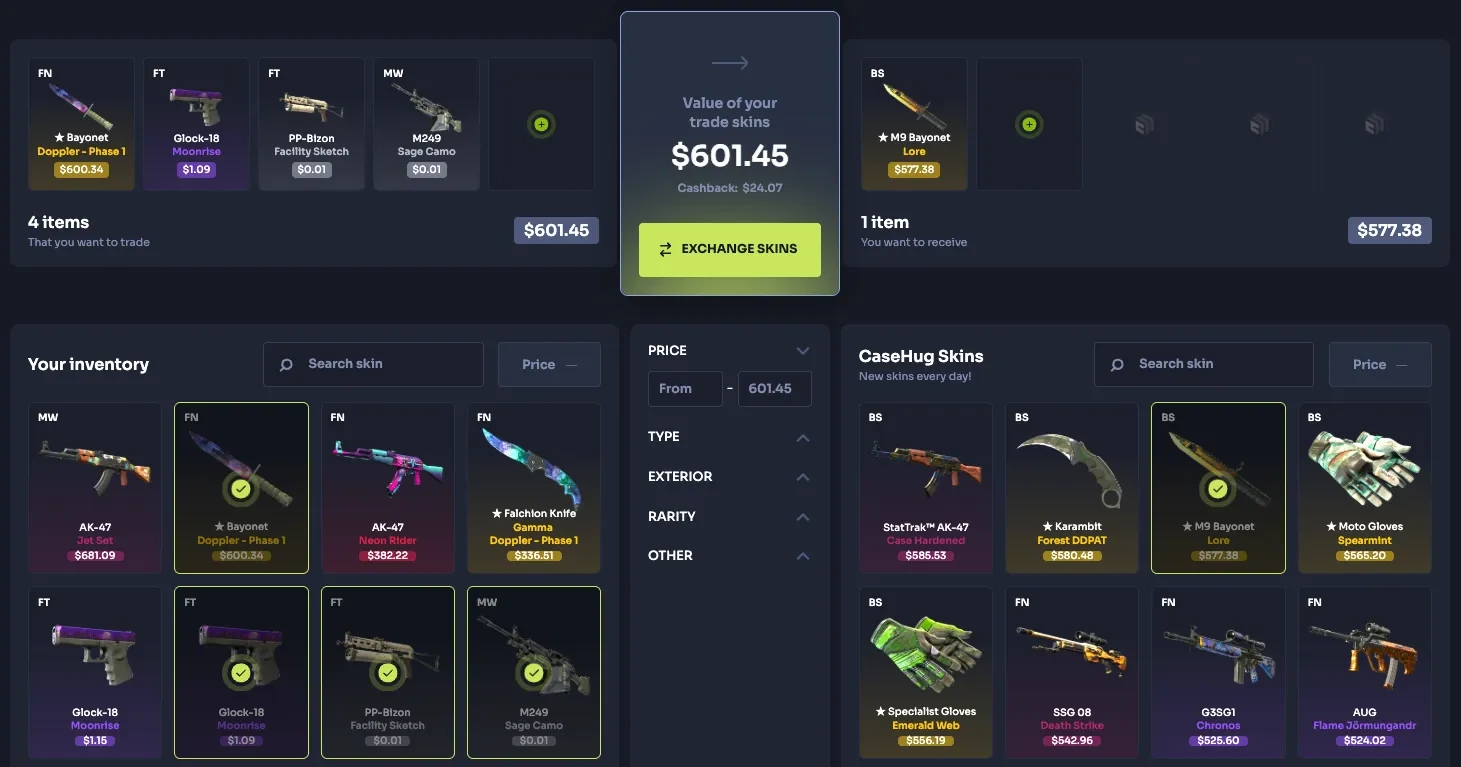
Step 3 — If choosing SkinChanger, compare the items on both sides before Exchange skins. Waiting for your original item remains an option.
Open the full-size image to read small interface details.04
Give support the stage that failed
A useful report says whether the item has no withdrawal action, is marked unavailable, has an offer pending on Steam, or has an accepted offer without the expected item. Include the exact message, item name and offer reference. These are distinct checks; repeating the same withdrawal request does not explain which stage failed.
For an expired or rejected offer, CaseHug’s guide says the item returns to the on-site inventory. Check that record before requesting another transfer. Once an offer is accepted, use Steam’s own trade status to understand any protection period.
BEFORE YOU CONTINUE
Quick checklist
- Select the exact item and the Steam withdrawal action.
- Save the current Trade URL, especially after regenerating it.
- Separate unavailable stock from a Steam account restriction.
- Review both sides of any exchange and the actual Steam offer.
Official sources
Read the official documents below for the service’s rules and account instructions.
Need the details for a particular website?
The code directory records each partner’s code, referral method and offer status. Use the relevant partner page when your question also involves one of those details.
Partner pages may include affiliate links. A listing does not confirm a reward or account eligibility.