
A CS2 pattern does not reach a weapon surface by one universal route. Some finish styles use the weapon's prepared UV coordinates. Others project the pattern through triplanar mapping. The difference changes how artwork crosses surfaces, where a recognizable motif appears and which problems you should fix in the source image.
Before adjusting a pattern that looks stretched, split or unexpectedly aligned, identify the application method. A good texture can look wrong when it is designed for a different kind of wrapping.
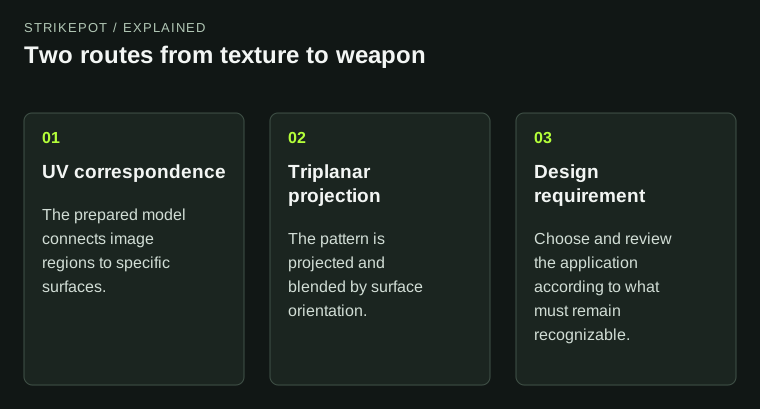
The mapping method determines which layout questions an artist should investigate first.
UVs connect a flat image to specific surfaces
UV coordinates describe how positions in a two-dimensional image correspond to positions on a three-dimensional model. You can think of the layout as a set of flattened surface pieces. Their arrangement makes it possible to put a particular graphic on a particular part of the weapon.
Valve's application guide compares this method with finishing separated weapon parts. That comparison explains why a pattern can appear to restart between components. The model's prepared coordinates, rather than the weapon's silhouette in your current view, determine the correspondence.
For a hypothetical illustrated receiver, this can be useful precision. An original face can be placed with its eye and mouth on known surfaces. The cost of that precision is responsibility: an artist must understand where those surfaces lie on the image and where they meet on the model.
Triplanar projection follows orientation
Triplanar mapping approaches the object from several directions and blends the application across surfaces. Valve associates it with the Spray-Paint style. The useful mental picture is a stencil projected toward the weapon, rather than a drawing carefully attached to every flattened part.
This favors some design ideas. A broad irregular camouflage can remain convincing when it flows over a complicated surface. A tiny portrait that must remain undistorted at one exact location may be harder to control in that context. These are design implications of the mapping method, not a claim that one method is more advanced or valuable.
Look at transitions between differently oriented surfaces. If the pattern behaves strangely near a bevel or corner, the issue may be the projection relationship rather than a broken line in the original image. Flattening the source artwork differently will not necessarily solve it.
Choose according to the job of the graphic
Ask whether the artwork needs exact placement or a convincing all-over treatment. A label-like illustration with a deliberate relationship to a panel often benefits from a model-specific layout. An organic field of shapes may tolerate or benefit from projection across multiple surfaces.
Valve's Custom Paint documentation identifies a full-color image applied through original UVs. That tells an artist where to begin investigating a layout issue. It does not guarantee that every flat illustration will look intentional once folded over a weapon.
Write the design requirement plainly: the eye must stay visible in hand; the stripe should seem continuous across the upper surface; or no individual motif needs to occupy a fixed panel. Requirements like these make the mapping choice easier to evaluate than a preference for a technical label.
Use diagnostic artwork before detailed artwork
A simple temporary grid can reveal more than a polished texture. Give several areas distinct colors and include a few recognizable directions or shapes. Inspect how they land on the receiving weapon. You are learning the mapping, so the test image should make errors obvious.
For a UV-based application, note which image regions correspond to visible parts and where a feature crosses a boundary. For a projected application, rotate the view and examine how the same large shapes behave as the surface changes direction. Preserve a screenshot of the diagnostic result beside your notes.
This is a proposed development exercise, not a report of a test performed on a particular skin. It requires no item purchase and says nothing about an issued item's price. Its purpose is to make the texture-to-surface relationship visible before the artwork becomes expensive to revise.
Separate scale, placement and mapping
A motif can be too large even when the mapping is correct. It can sit in an unfortunate position even when its size is right. It can also break because the application method does not match the design. These are different diagnoses.
Change one part of the problem at a time. First confirm the method and receiving model. Then evaluate motif size. Then adjust permitted placement behavior. If you change the artwork, scale and style simultaneously, a better result will not tell you which change helped.
The inventory pattern and wear guide serves a different purpose: it interprets properties of an existing item. Creator mapping knowledge explains how applications are constructed; it does not let you infer an individual item's identity from an attractive region alone.
When asking another artist for help, show the source pattern beside the problematic surface and name the selected application method. A crop of the finished weapon alone may hide whether the issue began in the image, its placement or the receiving model. That small amount of context makes technical feedback much more specific.
Review the object, not just the flat image
A layout is ready for further art development when its important relationships work on the model. Look at the main held view, both sides and the transitions that were most likely to cause trouble. A correct flat image is necessary for some workflows, but it is not sufficient evidence of a good application.
If you are following someone else's design, the Workshop status guide explains why a preview remains a proposal. For creators, the immediate next step is simpler: identify whether the remaining issue belongs to the artwork or its mapping, then revise that part deliberately.