
A normal map can make a CS2 weapon finish look engraved, ridged or textured without adding that detail to the weapon's actual mesh. It changes how lighting reads the surface. That is why a raised-looking ornament can remain inside the same outer silhouette as an otherwise smooth weapon.
Understanding that boundary helps both creators and viewers. It tells an artist which kinds of detail the technique can communicate and prevents a dramatic close-up from being mistaken for a new physical weapon model.
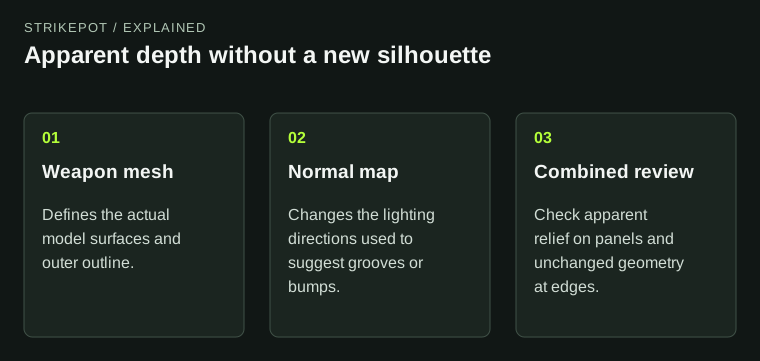
The visual separates surface shading detail from physical model construction.
Surface lighting and object shape are different layers
The mesh supplies the weapon's geometry: the surfaces and outline that form the object. A normal map supplies information used to calculate the direction a surface appears to face for lighting. Valve's technical guide describes the resulting appearance of depth without added polygons.
Imagine a hypothetical original finish with thin decorative grooves. As light moves across the weapon, the grooves can appear to catch light on one side and fall into shade on the other. From a suitable angle, they may feel convincingly recessed.
Now examine the outer edge. If the groove detail exists only in the normal map, it has not carved new notches into the silhouette. This is a useful visual boundary, not a flaw to conceal. The technique is strongest when the scale and purpose of the detail suit a surface treatment.
Choose detail that supports the material story
Fine grain, shallow engraving and controlled embossed ornament can all suggest different materials or manufacturing choices. The design question is whether that suggestion belongs with the rest of the finish. A smooth painted area with one carefully placed relief accent may feel more deliberate than strong bumps spread over every surface.
Start with a clear hierarchy. Which feature should be visible during ordinary play? Which should reward inspection? Which should remain quiet? A normal map can add useful information, but adding depth to every line can make the surface harder to read.
For the imaginary groove design, the principal ornament might receive the strongest surface detail while secondary lines remain flatter. That keeps the visual emphasis connected to the composition instead of letting a technical effect dictate it.
The map must correspond to the receiving weapon
Valve's normal-map announcement explains that these maps use the weapon's original UV layout. The practical implication is that surface detail must line up with the intended parts. A groove that belongs inside a painted border should not drift onto an unrelated panel.
Review the color artwork and normal detail together. A painted highlight that suggests light from one direction can conflict with the dynamic shading produced by the normal map. The result may look convincing in one fixed frame and confused as the view changes.
Use the actual model rather than a flat composite as the final authority. A side-by-side texture preview can confirm file alignment, but it cannot show every surface turn, seam or view-dependent effect.
Test the impression from several angles
Rotate the view slowly enough to follow the main detail. Does the engraving continue to read as engraving, or does it flip into a strange raised shape? Does a broad textured area become visually noisy? Does the effect disappear entirely at the scale where you intended it to matter?
Then inspect an edge and a broad panel. These answer different questions. The edge clarifies the unchanged silhouette; the panel shows the lighting treatment. Preserve both when explaining the work to someone else.
This is a suggested review process, not a claim that we tested a named skin. A particular result still depends on its artwork, normal map, material and scene. The point is to evaluate the relationship rather than judge the technique from a single flattering image.
Coordinate apparent relief with wear
The historical announcement also notes that supported durability controls can work with the apparent surface detail. That creates an art opportunity: the wearing paint and the raised-looking structure can tell a coherent story instead of behaving as unrelated effects.
For example, a hypothetical ornament might remain legible after some paint is lost, while minor surface marks become less prominent. Plan that relationship rather than assuming a normal map automatically decides which artwork survives.
For an owner, the relevant question remains what the actual item looks like. The wear and pattern guide explains why the numeric description and visible surface should be considered together. A normal-map explanation does not replace that individual inspection.
Keep the scale of the relief appropriate to its supporting artwork. If an apparent ridge becomes much stronger than the painted border that explains it, the effect may read as an unrelated lump. Reducing the surface detail can restore the illustration rather than weaken it. The goal is a legible material relationship, not the maximum possible impression of depth.
Do not infer new gameplay geometry from decorative depth
A relief effect in the finish is not evidence that a weapon has gained a physical attachment or a different silhouette. Keep the base weapon identity separate from how its surface is shaded. A name, illustration and apparent engraving can all change the visual reading without describing a new weapon category.
When discussing a submission, label the effect accurately. “Normal-mapped engraving effect” tells another artist what to review. “New carved model” makes a different claim and needs different evidence. The Workshop guide also distinguishes an experimental preview from an issued item.
Use normal detail where it strengthens the design's material logic. If the idea requires a changed outline or a large projecting shape, recognize that it has moved beyond what a surface-lighting map alone demonstrates. Choosing the appropriate technique begins with that honest boundary.